unit test are annoying and time consuming. ist not fun at all, and the customer does not see any value in tests…..
i hear this all the time, and at some point in my tech career i also belived this. Then i wrote my first test an found a bug. At this point lightbulds started to glow and i realised that i woul not found the bug bymyself.
In the worst case the customer would have found the bug :C
As we all know writing tests makes our software more stable and maintainability will be increased.
unit tests with the inventor api
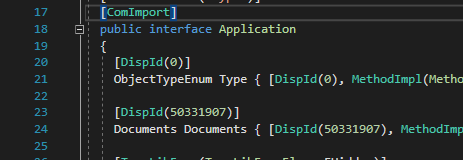
AutoCad Inventor makes it very difficult to write testable code. At some point i thought that i am lucky. The api is completly build by interfaces.
Deploying your code to the end user can be difficult. I recommend using an installer/ setup to deploy your Addin. This ensures that the addin is installed/ unistalled correctly and if you change the installation folder you can do this without any trouble.
I tried and used a few installer. Here are some of my thoughts.
I recommend using ‚folder/file copy‘ installer. In some cases the dependecy determine can fail and does not install the right assemblies or versions.
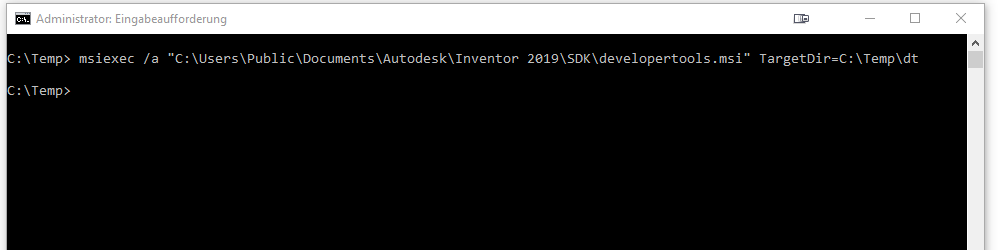
deployment via msi package and Inno Setup
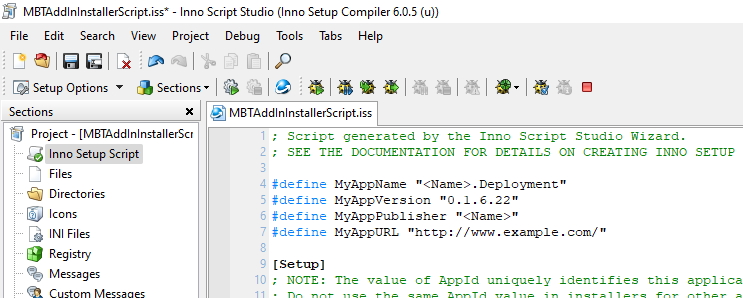
In my case i am using ‚Inno Setup‚ and the related ‚Inno Script Studio‚. It is a free installer for Windows msi. It also has an CI-CD support for Azure Dev Ops support available on github.
the following setup is located in the folder : ..\AddInFolder\Deployment
; Script generated by the Inno Script Studio Wizard.
; SEE THE DOCUMENTATION FOR DETAILS ON CREATING INNO SETUP SCRIPT FILES!

#define MyAppName "MBTTools.Deployment"
#define MyAppVersion "0.1.6.22"
#define MyAppPublisher "MBT Tools"
#define MyAppURL "http://www.example.com/"

[Setup]
; NOTE: The value of AppId uniquely identifies this application.
; Do not use the same AppId value in installers for other applications.
; (To generate a new GUID, click Tools | Generate GUID inside the IDE.)
AppId={{D1303A7C-F22B-49B3-8E60-A22BA82DA0D1}
AppName={#MyAppName}
AppVersion={#MyAppVersion}
;AppVerName={#MyAppName} {#MyAppVersion}
AppPublisher={#MyAppPublisher}
AppPublisherURL={#MyAppURL}
AppSupportURL={#MyAppURL}
AppUpdatesURL={#MyAppURL}
DefaultDirName={commonappdata}\Autodesk\ApplicationPlugins\MBDPowerTools
DefaultGroupName={#MyAppName}
DisableProgramGroupPage=yes
OutputDir=..\AddInFolder\Deployment
OutputBaseFilename=<name>Installer
Compression=lzma
SolidCompression=yes

[Languages]
Name: "english"; MessagesFile: "compiler:Default.isl"
Name: "german"; MessagesFile: "compiler:Languages\German.isl"

[InstallDelete]
Type: filesandordirs; Name: "{sd}\ProgramData\Autodesk\ApplicationPlugins\<Name>\*"
Type: filesandordirs; Name: "{sd}\ProgramData\Autodesk\ApplicationPlugins\<Name>Tools\*"
Type: filesandordirs; Name: "{commonpf}\Autodesk\ApplicationPlugins\<Name>\*"; Languages: english german
Type: filesandordirs; Name: "{commonpf}\Autodesk\ApplicationPlugins\<Name>Tools\*"; Languages: english german


[Files]
Source: "..\<Name>\bin\Debug\*"; DestDir: "{commonappdata}\Autodesk\ApplicationPlugins\<Name>Tools"; Flags: ignoreversion recursesubdirs createallsubdirs
; NOTE: Don't use "Flags: ignoreversion" on any shared system files

[Icons]
Name: "{group}\{cm:UninstallProgram,{#MyAppName}}"; Filename: "{uninstallexe}"
on this site i will talk about how you can start implementing your own add in for the 3D CAD Software Inventor. This will explain how to implement a basic addin without any functionality.
Inventor provides a lot of functionality , but sometimes you want to improve these features or you want to add own features. You can achive this with the powerfull Inventor Api.