Table of Contents
intention
on this site i will talk about how you can start implementing your own add in for the 3D CAD Software Inventor. This will explain how to implement a basic addin without any functionality.
Inventor provides a lot of functionality , but sometimes you want to improve these features or you want to add own features. You can achive this with the powerfull Inventor Api.
The used example can be found on GitHub.
requirements
- Inventor installed (theoreticly you do not need Inventor installed. You just need the refernce to the ‚Autodesk.Inventor.Interop‘ assembly)
- optional: Inventor SDk installed
The SDK will install different tool and some example files. In the folder ‚UserTools‘ there are some examples which will help to understand whats going on.
C:\Users\Public\Documents\Autodesk\Inventor <version>\SDK
Note (Jan 2021): The Developer Tools currently only support Microsoft Visual Studio 2017 and earlier.
If this is still an issue here use the link for older VS versions or try to extract the msi content via console
- Visual Studio installed. It works with the community edition
getting started
first of all you need to create an AddIn solution/project. This can be done via templates (description here) or manually.
here i will show you step by step how this is done.
The addin consists of two parts
- code (your business code)
- *.addin (description of you addIn)
create the code
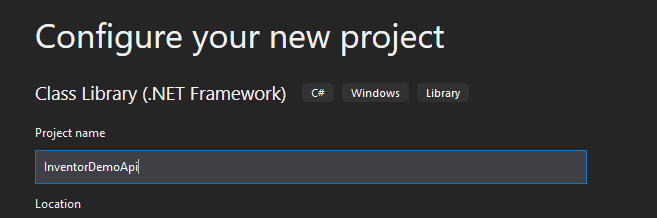
- create a library :
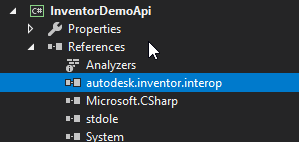
2. add a reference to the latest interopt assembly (autodesk.inventor.interop.dll)
C:\Windows\Microsoft.NET\assembly\GAC_MSIL\Autodesk.Inventor.Interop\v4.0_23.0.0.0__d84147f8b4276564\autodesk.inventor.interop.dll
3. create you Application Addin Server
public class MyAddIN : Inventor.ApplicationAddInServer
 {
        public void Activate(ApplicationAddInSite AddInSiteObject, bool FirstTime)
        {
            throw new NotImplementedException();
        }

        public void Deactivate()
        {
            throw new NotImplementedException();
        }

        public void ExecuteCommand(int CommandID)
        {
            throw new NotImplementedException();
        }

        public object Automation { get; }
 }
Since Inventor uses COM we need to indentify our assembly to COM. You use the ‚[GuidAttribute(xxxx)]‘ attribute .
online Guid Generator
[GuidAttribute("a7695474-67ee-49da-9a09-283ef242a9b2")]
public class MyAddIN : Inventor.ApplicationAddInServer
{
...
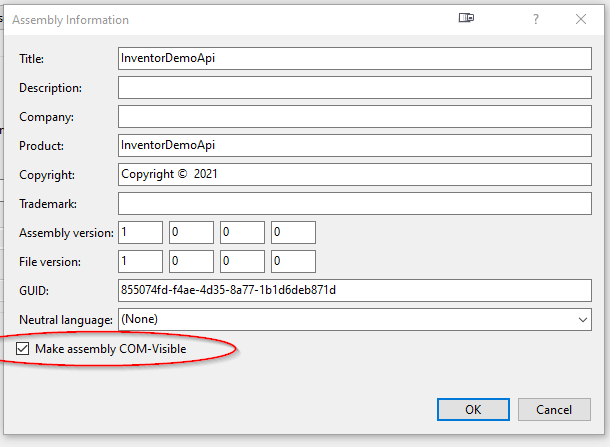
4. make you assembly COM visible
open your assembly informations and check ‚Make assembly COM-Visible‘
create the *.addin File
add a text file to you project and name it <ProjectName>.addIn and add the following content to it. BuildAction : Copy to Output Directory : Copy if newer.
<Addin Type="Standard">
	<!--Created for Autodesk Inventor Version 24.0-->
	<ClassId>{a7695474-67ee-49da-9a09-283ef242a9b2}</ClassId>
	<ClientId>{a7695474-67ee-49da-9a09-283ef242a9b2}</ClientId>
	<DisplayName>InventorDemoApi</DisplayName>
	<Description>InventorDemoApi</Description>
	<Assembly>InventorDemoApi.dll</Assembly>
	<LoadOnStartUp>1</LoadOnStartUp>
	<UserUnloadable>1</UserUnloadable>
	<Hidden>0</Hidden>
	<SupportedSoftwareVersionGreaterThan>17..</SupportedSoftwareVersionGreaterThan>
	<DataVersion>1</DataVersion>
	<UserInterfaceVersion>1</UserInterfaceVersion>
</Addin>
The ClassId and ClientId should reflect you guid at the server class.
Debug your addin
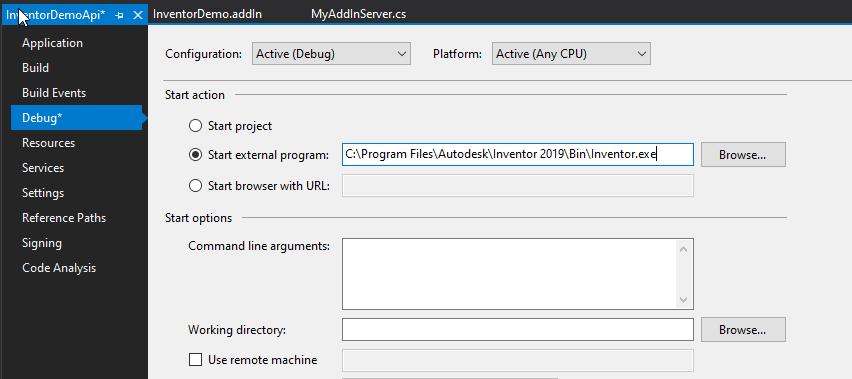
when debugging you addin you need to attach to the inventor process. Visual Studi can help you with this.
Open your project properties and navigate to the ‚Debug“ tab. Set ‚Start Action‘ to ‚Start external Program‘. in my case : C:\Program Files\Autodesk\Inventor 2019\Bin\Inventor.exe
Inventor needs to know that you add in exists. So you need to deploy you application to inventor. Go to the build events tab and add the xcopy command to the post events
XCOPY "$(Debug)*" "C:\ProgramData\Autodesk\ApplicationPlugins\InventorDemo\" /S /Y
This command require admin rights because i wants to write to ‚ProgramData‘. There are other places where you can deploy your code. This is described here.
When running you addin the first time it is blocked by inventor.
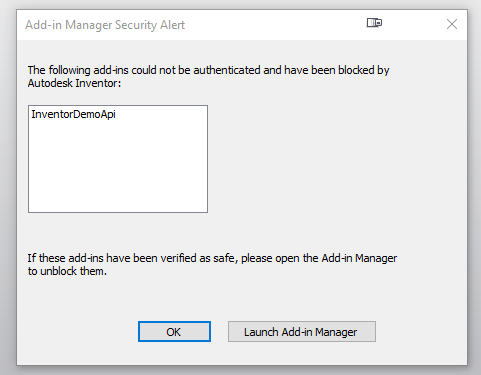
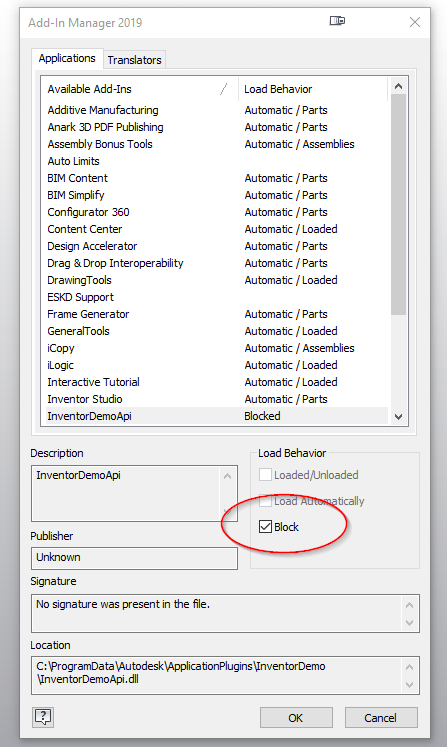
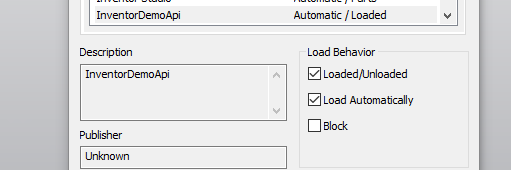
Launch Add-In Manager and unblock the addIn
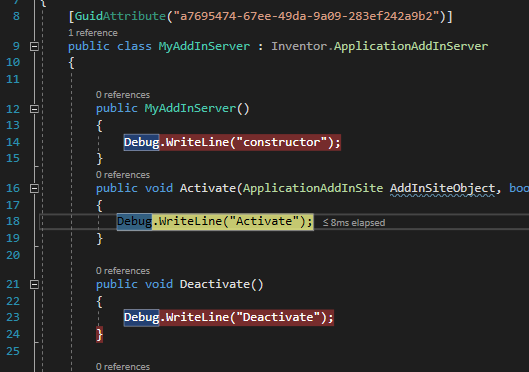
Congratulations you have created your own Inventor AddIn. Hitting F5 should start Inventor and the breakpoint in your code should be hit. If you have any trouble debugging you may check this site
Happy Coding!!
Hello,
Nice tutorial about Inventor addin. This way you can still extract developer tools for Visual Studio.
Copy developertools.msi from C:\Users\Public\Documents\Autodesk\Inventor 2020\SDK to C:\DeveloperTools
Run command line as an administrator and run following command.
msiexec /a „c:\developertools\developertools.msi“ TARGETDIR=c:\DeveloperTools\DT
This will create DT directory and installs MSI package. Trying to install MSI to same directory generates an error calling the .msi corrupt!
Locate Inventor C# template for Visual Studio.
C:\DeveloperTools\DT\VS15.0_USRPRJTEMPL\Documents\Visual Studio 2017\Templates\ProjectTemplates
You can find other templates too if you need.
Copy VCSInventorAddInTemplate2020.zip to your Visual Studio templates directory:
For Visual Studio 2020: C:\Users\youruser\Documents\Visual Studio 2020\Templates\ProjectTemplates\Visual C#
Start Visual Studio
Create new Autodesk Inventor AddIn project in Visual Studio
Wie kann man zwei Punkte per API zu einem kombinieren